Turkey Place Card Holders
Your children can help decorate your Thanksgiving table and make a gift
for relatives, with these easy to make pinecone turkeys. For an extra
touch add place cards for your family members and then they can take
the handmade turkeys home.

You'll Need:
A dry pinecone for each guest
chenille stems (pipe cleaners) in brown or tan
Craft feathers
Craft glue
Cardstock paper

Lightly dip the ends of the feathers into the glue and then insert into the back of the pinecone turkey body. Repeat until you have all of your tail feathers. Allow the glue to dry. Fold the chenille stem in half and then bend the tip a bit to make the head. Twist the chenille stem around the tip of the pine cone to create the head and neck and then twist to secure. You may want to fashion some feet with the tips of the stem to help hold the turkey in place. Using cardstock paper, cut, fold and write the name on your place card when it's time to set the table, place it in front of the turkey

Variation for an even easier craft!
You'll Need:
-A dry pinecone for each guest
-chenille stems (pipe cleaners) in brown or tan
-Pine sprigs for each setting
-Address Label stickers
Cut the chenille stems in half with wire cutters. Make a loop and twist
the ends for the feathers. Twist a brown or black chenille for the head and neck. Insert the feathers etc. into the pinecone. Use two address labels for each setting. Write the name on one of the labels. Secure the two labels together with the pipe cleaner in between them both. This avoids a messy glue situation! At table setting time, place the turkeys onto a pine sprig,
add a few nuts and your done!
Kit's Tip: I use the "fuzzy" pipe cleaners for thicker feathers.

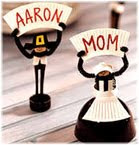
 Create a hat from black and white paper, or a bonnet from a strip of white paper cut and formed as shown.


