Showing posts with label Fall. Show all posts

Paper Bag Turkey

What you'll need:

  • Brown paper lunch bag
  • Acrylic paint or crayons: brown, red, orange, green, yellow
  • Rubber band
  • Newspaper
  • Plastic spoon
  • Scraps of felt: orange, brown, green and maroon (or red)
  • 2 medium wiggle eyes
  • White craft glue
  • Scissors

How to make it:

  1. Lay paper bag flat on the work surface.
  2. Use crayons or paint (crayons are less messy and will be much easier for younger children) to add stripes of colors to the opening of the bag, about 5-6” long (see image).
  3. Open the bag and be sure to add stripes to the sides as well.
  4. Cut the strips with scissors (see image).
  5. Paint or color the other side of the strips. This is a little messier, so be sure kid are wearing smocks and your work surface is protected. When painting the other side of a strip, the paper may curl up on you. Just hold it flat for a few seconds and this will correct it (see image). Allow the strips to dry completely.
  6. Fill the bag halfway with crumpled newspaper.
  7. Gather the bag together with your hands, just under the strips, and secure with a rubber band (see image).
  8. Pinch the bag, just under the rubber band, to bend the strips upward so that when the bag lies on its side, the strips will be pointing upward. Use your hands to manipulate the strips to point up; these are your turkey’s feathers (see image).
  9. Cut the following from felt: Triangle – beak - orange; Heart – gobbler – maroon/red; 2 triangles – feet - brown; Bowtie – green
  10. Paint the plastic spoon with tan or brown paint and let dry (see image).
  11. Glue the gobbler, beak and eyes onto the spoon face.
  12. Place the bag on the work surface on its side with the feathers pointing up. Make a small hole at the end of the bag where the neck and head should be.
  13. Push the handle of the plastic spoon into the hole and add some glue to the opening (see image).
  14. Cut toes from the flat end of the two brown triangles and dot some glue on the triangle points. Place bag body on top of the feet so glue will catch. Let dry (see image).
  15. Glue the bowtie where the spoon meets the bag.

Tips:

  1. For added fun, draw a sign on a piece of construction paper that says “Happy Thanksgiving” and glue to the front (chest) of the bag.
  2. If you would like to keep the mess minimal, use markers or crayons instead of paint.
  3. Save scraps of felt from other projects to use with projects such as this.

  • Digg
  • Del.icio.us
  • StumbleUpon
  • Reddit
  • RSS
Read Comments

Dried Apple Head Dolls

The fall reminds me of a craft we used to do when I was little. We used to turn this:

into these:


OK, truth be told ours never looked that good.  I haven't done this in years so I decided to go looking for some good directions.  There is a great site (where these pictures came from) that has excellent step by step directions so rather than rehash the whole thing - here are two options:

Super detailed instructions at http://www.appledolls.org/

or less detailed instructions at ehow.com

Enjoy drying apples!

  • Digg
  • Del.icio.us
  • StumbleUpon
  • Reddit
  • RSS
Read Comments

Fall paper printables

Found this site with a few fall oriented printable pages - some are colorable.  Could make a great afternoon activity for the family!

Fall Printables!

  • Digg
  • Del.icio.us
  • StumbleUpon
  • Reddit
  • RSS
Read Comments

Paper Plate Jack-O'-Lantern

You can make these pumpkins to decorate your house for Halloween.  They are easy and fun for kids to help with.


What you'll need:
  • Mini paper plate 
  • Orange acrylic craft paint
  • Yellow craft foam
  • Green craft foam
  • Brown craft foam
  • Scissors
  • Glue

 How to make it:


1. Place the paper plate upside down on your work surface and paint it orange. Set aside to dry and repeat with a second coat if needed.


2. Cut out facial shapes (triangles for eyes and a mouth with a few missing teeth) and glue to the plate.


3. Use scissors to trim the plate into a pumpkin-like shape. Do this by cutting a dip in the top where the stem would be and trim the bottom to flatten it a bit.


4. Cut two simple oval-shaped leaves from green craft foam and glue to back of the plate at the top of the pumpkin.


5. Cut a simple rectangular stem from brown craft foam and glue to the back of the plate, between the leaves.

  • Digg
  • Del.icio.us
  • StumbleUpon
  • Reddit
  • RSS
Read Comments

Pumpkin Jar


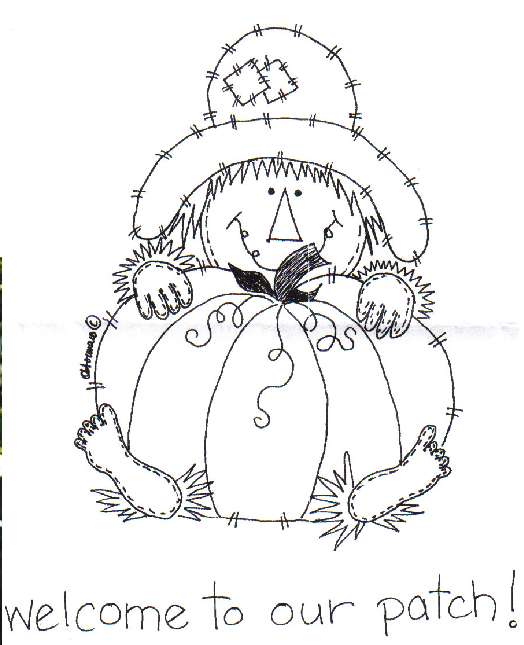
This scarecrow with a pumpkin is a great fall decoration! 

What you need:
Glass Jar
Liner and Shader Brushes
Micron Black Craft Pen
Old Toothbrush
Acrylic Matte Spray
Blank Scarecrow Image

Acrylic paint colors used in the image:
Antique White, AC Flesh, Pumpkin, Tangerine, Georgia Clay, Pink Quartz, Bonnie Blue, Trail Tan, Yellow, Dark Forest Green, White, Black

 Instructions:

Base coat surface with 2-3 coats of Antique White.

Trace pattern onto base coated surface.

Paint pumpkin with Pumpkin paint. Shade lines with Tangerine and Georgia Clay.

Paint face, hands and feet with AC Flesh. Paint nose with Georgia Clay and shade with Black. Draw on mouth eyes and stitches with Micron craft pen. Use ratty or scruffy brush to dot on cheeks with Pink Quartz.

Paint hat with Bonnie Blue. Mix a very small amount of black with Bonnie Blue to use for shading hat. Patches are Trail Tan, criss-cross with Georgia Clay.

Paint pumpkin stem and vines with Dark Forest Green.

Use fine liner brush with Yellow and Georgia Clay for straw around feet, hands and face.

Use Micron craft pen to draw on all stitches around hat and pumpkin.

Splatter completed surface with White and then with Black using the bristles of an old toothbrush.

Sign your work! Spray your completed project with 2-3 coats of acrylic spray sealer according to directions on can.

Tip: If you are painting on jars, prepare your surface by washing the jar, completely removing all labels and glue, then giving the jar a rinse in white vinegar or rubbing alcohol. Allow the first coat of base to dry completely before attempting second coat!

This post was found at AllFreeCrafts.com and was originally designed by Amanda Formaro - Amanda is the entrepreneurial mother of four children. She is also the owner of FamilyCorner.com Magazine.

  • Digg
  • Del.icio.us
  • StumbleUpon
  • Reddit
  • RSS
Read Comments